先回までに認証(OAuth2)やアカウント情報(UserInfo)を紹介した、クラウド上のストレージサービス[Box]のAPI記事の第3弾です。今回はファイルをダウンロードするサンプルです。
ファイルIDの取得
今回は、ファイルのダウンロードを行う部分にフォーカスするので、対象とするファイルのIDに関する取得部分は割愛します。ID自体もAPIで取得できます。最も簡単な方法としては、ウェブブラウザでストレージを表示してファイルを選択した際に表示される番号で分かります。

上図の赤線で囲んだ部分の数字がファイルのIDです。
APIを使ったファイルのダウンロード
今回もVisual C#を使って手順を紹介していきます。準備する情報として、上記で説明したファイルIDの他に、APIを利用するためのアクセストークンという文字列も必要になります。トークンについては、過去記事のアカウント情報(UserInfo)をご覧ください。
ファイルIDとアクセストークンの準備が出来たら、次の手順でファイルのダウンロードを行います。
- プロジェクトに、新しい[Web Form]を追加します。(名前は分かりやすく[Download.aspx]にしています)

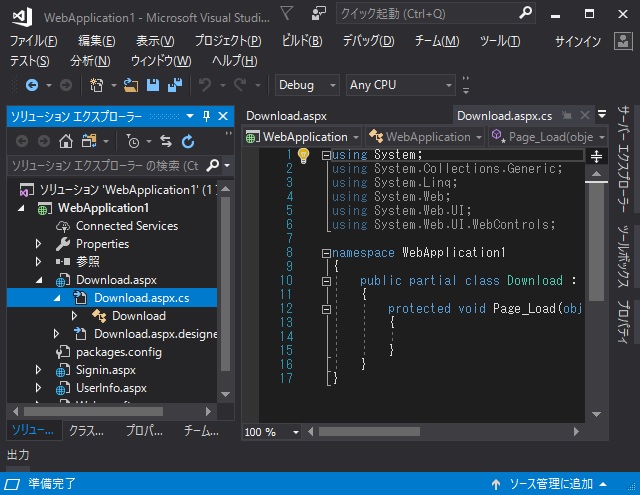
- [ソリューション エクスプローラー]内に追加された[Download.aspx]を展開して[Download.aspx.cs]を選択します。
- 表示された[Download.aspx.cs]の先頭に次のコードを追加します。
string sFid = "ファイルID";
string sToken = "アクセストークン";
string sDownloadPath = "ダウンロード先のファイルパス";

System.Text.StringBuilder sb = new System.Text.StringBuilder();
byte[] ba = System.Text.Encoding.UTF8.GetBytes(sb.ToString());
System.Text.Encoding enc = System.Text.Encoding.GetEncoding("utf-8");

string sUrl = "https://api.box.com/2.0/files" + sFid + "/content";
System.Net.HttpWebRequest req = (System.Net.HttpWebRequest)System.Net.WebRequest.Create(sUrl);
req.Method = "GET";
req.ContentType = "application/x-www-form-urlencoded";
req.ContentLength = ba.Length;
req.Headers.Add("Authorization: Bearer " + sToken);

System.Net.WebResponse res = req.GetResponse();
System.IO.Stream resStream = res.GetResponseStream();

byte[] bFile = ReadBinaryData(resStream);

System.IO.FileStream fs = new System.IO.FileStream(sDownloadPath, System.IO.FileMode.Create, System.IO.FileAccess.Write);
fs.Write(bFile, 0, bFile.Length);
fs.Close();
[ReadBinaryData]部分は、実際に戻ってきたファイルの内容をバイト配列に変換する部分です。外部関数化をしたので、次のコードをページの最下部あたりに追加します。
static public byte[] ReadBinaryData(System.IO.Stream st)
{
  byte[] buf = new byte[32768];
  using (System.IO.MemoryStream ms = new System.IO.MemoryStream())
  {
    while(true)
    {
      int nRead = st.Read(buf, 0, buf.Length);
      if(nRead > 0)
      {
         ms.Write(buf, 0, nRead);
      }
      else
      {
         break;
      }
    }
    return ms.ToArray();
  }
}
ファイルのダウンロード
[ビルド|ソリューションのビルド]メニューでエラーが無ければ、[デバッグ|デバッグの開始]メニューを選択してストレージから目的のファイルがダウンロードできるか確かめてみます。
最終的なコードは、こんな感じになります。
public partial class Download : System.Web.UI.Page
{
  protected void Page_Load(object sender, EventArgs e)
  {
    string sFid = "ファイルID";
    string sToken = "アクセストークン";
    string sDownloadPath = "ダウンロード先のファイルパス";

    System.Text.StringBuilder sb = new System.Text.StringBuilder();
    byte[] ba = System.Text.Encoding.UTF8.GetBytes(sb.ToString());
    System.Text.Encoding enc = System.Text.Encoding.GetEncoding("utf-8");

    string sUrl = "https://api.box.com/2.0/files" + sFid + "/content";
    System.Net.HttpWebRequest req = (System.Net.HttpWebRequest)System.Net.WebRequest.Create(sUrl);
    req.Method = "GET";
    req.ContentType = "application/x-www-form-urlencoded";
    req.ContentLength = ba.Length;
    req.Headers.Add("Authorization: Bearer " + sToken);

    System.Net.WebResponse res = req.GetResponse();
    System.IO.Stream resStream = res.GetResponseStream();

    byte[] bFile = ReadBinaryData(resStream);

    System.IO.FileStream fs = new System.IO.FileStream(sDownloadPath, System.IO.FileMode.Create, System.IO.FileAccess.Write);
    fs.Write(bFile, 0, bFile.Length);
    fs.Close();
  }

  static public byte[] ReadBinaryData(System.IO.Stream st)
  {
    byte[] buf = new byte[32768];
    using (System.IO.MemoryStream ms = new System.IO.MemoryStream())
    {
      while(true)
      {
        int nRead = st.Read(buf, 0, buf.Length);
        if(nRead > 0)
        {
          ms.Write(buf, 0, nRead);
        }
        else
        {
          break;
        }
      }
      return ms.ToArray();
    }
  }
}
まとめ
Web向けのAPIが理解できてくると、ファイルなどをストレージに連携するアプリケーションなどが簡単に作れます。
VisualStudioは、Windows向けの他に、AndroidやiOS向けのアプリケーションも開発できるようになってきているの、様々なプラットフォーム向けに連携アプリをリリースすることも可能です。
クロスプラットフォーム向けのVisualStudioの使い方などは別記事をご覧ください。
スポンサーリンク
最後までご覧いただき、ありがとうございます。

