



Windows11のPython環境に[Stable Fast 3D]をインストールする手順を備忘録的に投稿しておきます。
Stable Fast 3Dのインストール
Pythonの仮想環境に[Stable Fast 3D]をインストールする際に、今回もハマったので成功した手順を記録しておきます。
いつものように、インストールの操作[Visual Studio Code]を使いました。
仮想環境の追加
他のPython環境を汚さないために仮想環境を追加します。
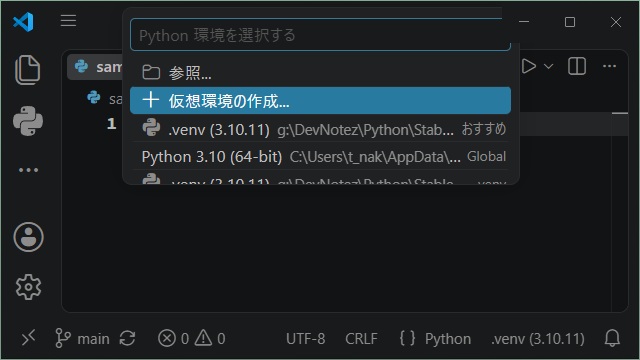
python -m venv venvVSCodeの場合は、コマンドパレットから[仮想環境も作成]できます。
アクティブ化とPipの更新
作成した仮想環境をアクティブ化します。
(Set-ExecutionPolicy -Scope Process -ExecutionPolicy RemoteSigned) ; (& g:\DevNotez\Python\StableDiffusion3D\.venv\Scripts\Activate.ps1)アクティブ化の後は、決まり文句で pip を更新しておきます。
pip install --upgrade pipCUDA関連のライブラリを追加
GPUを使うためのライブラリを追加します。
利用するグラフィックカードに対応したCUDAをあらかじめインストールしておきます。
今回成功したのは、CUDA 12.8 の関連ライブラリなので、こんな感じでインストールを行います。
pip install torch==2.7.1+cu128 torchvision==0.22.1+cu128 torchaudio==2.7.1 --extra-index-url https://download.pytorch.org/whl/cu128Stable Fast 3Dのインストール
Gitから[Stable Fast 3D]をコピーします。
git clone https://github.com/Stability-AI/stable-fast-3d.gitプロジェクト内に[stable-fast-3d]フォルダーが追加されます。
フォルダー内の[requirements.txt]をメモ帳などで開きます。
einops==0.7.0
jaxtyping==0.2.31
omegaconf==2.3.0
transformers==4.42.3
open_clip_torch==2.24.0
trimesh==4.4.1
numpy==1.26.4
huggingface-hub==0.23.4
rembg[gpu]==2.0.57; sys_platform != 'darwin'
rembg==2.0.57; sys_platform == 'darwin'
pynanoinstantmeshes==0.0.3
gpytoolbox==0.2.0
./texture_baker/
./uv_unwrapper/
個別でインストールを行うので末尾の2行を削除して保存します。
cd stable-fast-3d
pip install -r requirements.txt
でインストールを行います。
Visual Studio 2022 のインストール
[stable-fast-3d]はインストール時にコンパイルが行われます。そのためC/C++のコンパイラーが必要になります。
公式では[Visual Studio 2022]が推奨されているので、インストールされていない場合にはインストールを行います。
texture_baker / uv_unwrapper コンパイルの準備
[texture_baker]と[uv_unwrapper]をインストールするために必要なwheelとninjaを追加します。
pip install wheel ninja次に、セットアップ必要なツールのバージョンを更新します。
pip install --upgrade "setuptools>=70.1"Devloper PowerShell for VS 2022 でコンパイル
Visual Studioのターミナルではコンパイルがし辛いので[Visual Studio 2022]のインストール時に追加される[Devloper PowerShell for VS 2022]を使います。
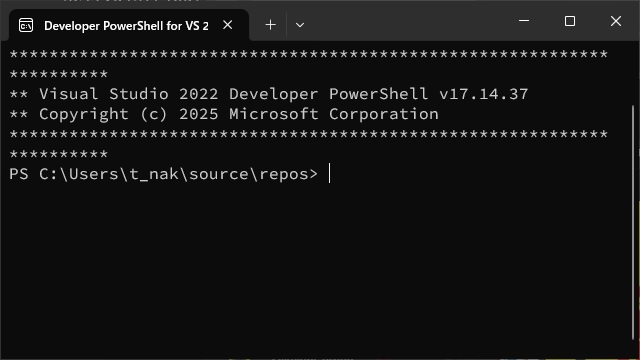
プロンプトの起動後に次のコマンドでx64版のコンパイラーが使えるように切り替えます。
cmd /k "C:\Program Files\Microsoft Visual Studio\2022\Community\Common7\Tools\VsDevCmd.bat" -arch=x64 -host_arch=x64一時的にCUDAのバージョンを変更します。
set CUDA_HOME=C:\Program Files\NVIDIA GPU Computing Toolkit\CUDA\v12.8
set PATH=%CUDA_HOME%\bin;%PATH%
set DISTUTILS_USE_SDK=1
その後にコンパイルを開始します。
cd <プロジェクトの場所>\stable-fast-3d
pip install --no-build-isolation .\texture_baker
成功すると、インストールが完了します。
Processing .\stable-fast-3d\texture_baker
  Preparing metadata (pyproject.toml) ... done
Building wheels for collected packages: texture_baker
  Building wheel for texture_baker (pyproject.toml) ... done
  Created wheel for texture_baker: filename=texture_baker-0.0.1-cp310-cp310-win_amd64.whl size=160232 sha256=d0fca5d5e9cf115f3203dbb30b3feedeab0817f05df21dcd1453d63e0f17ef07
  Stored in directory: C:\Users\t_nak\AppData\Local\Temp\pip-ephem-wheel-cache-fn4dwhxl\wheels\53\30\e4\b499e64ed96ee52b392042c8f9460b74533247223b882fa938
Successfully built texture_baker
Installing collected packages: texture_baker
Successfully installed texture_baker-0.0.1
同様に[uv_unwrapper]のインストールも行います。
pip install --no-build-isolation .\uv_unwrapper実行後に、次のコマンドで “OK” が表示されれば[Stable Fast 3D]のインストールは無事に完了です。
python -c "import texture_baker; print('texture_baker OK')"
python -c "import uv_unwrapper; print('uv_unwrapper OK')"
まとめ
今回は短い記事ですが、Windows11のPython環境に[Stable Fast 3D]をインストールする手順について書きました。
Windowsにインストールする場合、[texture_baker]と[uv_unwrapper]のインストール時にコンパイルで失敗する可能性が多いので、個別に[Devloper PowerShell for VS 2022]でインストールすると成功する確率が上がります。
[Stable Fast 3D]をWindows11のPython環境にインストールしたい人の参考になれば幸いです。
スポンサーリンク
最後までご覧いただき、ありがとうございます。