Google Chrome 拡張機能で設定ページを表示する[options_page]で表示したページの設定項目の内容を[chrome.storage]で保存・読み込みする機能を追加する方法を備忘録的に投稿しておきます。
Google for Developers の内容を参考にしています。
Chrome 拡張機能でオプション表示
Chromeの機能拡張で利用する設定項目を表示する[オプション]ページを表示するには[manifest.json]に “options_page” に表示するHTMLページなどのファイルを指定します。
詳しい内容は別記事をご覧ください。
オプション設定項目の保存と読み込み
追加した[オプション]ページに項目を用意して、設定値の保存や読み込みをするには次のようなファイルを用意します。
[OptionsPage]
|-[manifest.json]
|-[settings.html]
|-[settings.js]
|-[event.js]
用意したファイルそれぞれに、次のようなコードを追加します。
[manifest.json]
{
    "manifest_version": 3,
    "name": "設定を表示",
    "version": "1.0",
    "options_page": "settings.html",

    "background": {
        "service_worker": "event.js"
      },

    "permissions": [
      "storage",
      "activeTab",
      "contextMenus"
    ]
}

[settings.html]
<!DOCTYPE HTML>
<html lang="ja">
  <head>
    <meta charset="utf-8" />
    <title>設定</title>
  </head>
  <body>
    <p>設定 1:<input type="text" id="option_1" value="1" /></p>
    <p>設定 2:<input type="text" id="option_2" value="2" /></p>
    <input type="button" id="store" value="保存" />
    <input type="button" id="clear" value="初期設定に戻す" />

    <script src="settings.js"></script>
  </body>
</html>

[settings.js]
const storeOptions = () => {
    const option_1 = document.getElementById('option_1').value;
    const option_2 = document.getElementById('option_2').value;

    chrome.storage.sync.set(
        { option1: option_1, option2: option_2 },
        () => {
        //設定項目読み込み後の処理
        }
    );
};

const loadOptions = () => {
    chrome.storage.sync.get(
        { option1: '1', option2: '2' },
        (items) => {
            document.getElementById('option_1').value = items.option1;
            document.getElementById('option_2').value = items.option2;
        }
    );
};

const clearOptions = () => {
    chrome.storage.sync.clear();
    loadOptions();
};

document.addEventListener('DOMContentLoaded', loadOptions);
document.getElementById('store').addEventListener('click', storeOptions);
document.getElementById('clear').addEventListener('click', clearOptions);

[event.js]
'use strict';
{

  const updateContextMenus = async () => {
    await chrome.contextMenus.removeAll();

    chrome.contextMenus.create({
        id: "open-settings",
        title: "設定"
    });
  };

  chrome.runtime.onInstalled.addListener(updateContextMenus);
  chrome.runtime.onStartup.addListener(updateContextMenus);
  chrome.contextMenus.onClicked.addListener((info, tab) => {
    chrome.runtime.openOptionsPage();
  });
}
これで拡張機能をインストールしてページで右クリックでコンテキストメニューに[設定]が追加されます。
[オプション]ページの表示方法
コンテキストメニューに追加された[設定]を選択すると、[manifest.json]の “options_page” で指定したHTMLファイルの内容が表示されます。
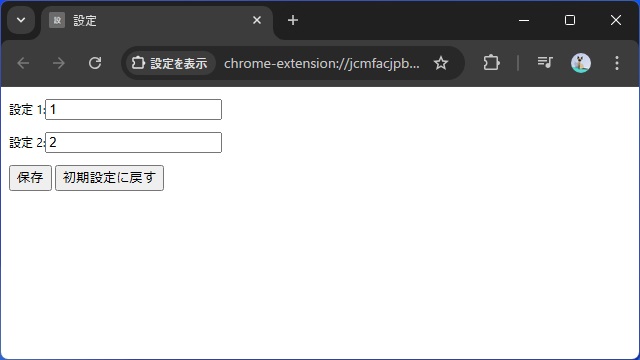
[設定]画面で[保存]ボタンをクリックすると[settings.js]内の “storeOptions” 関数が動作して chrome.storage.sync で保存されます。
ページのロード時に “loadOptions” 関数を呼び出して、chrome.storage.sync で保存した内容を項目に読み込んでいます。
また[初期設定に戻す]ボタンをクリックすると chrome.storage に保存した内容を削除できます。
こんな感じで、XMLやJSON形式の一時ファイルを用意しなくても、chrome.storage を利用して簡単に設定値が保存できます。
まとめ
今回は、Google Chrome 拡張機能で設定ページを表示する[options_page]で表示したページの設定項目の内容を[chrome.storage]で保存・読み込みする機能を追加する方法を書きました。
chrome.storage を利用して、レジストリやXMLやJSON形式の一時ファイルを用意しなくても、簡単に設定値が保存や読み込みが可能でした。
Google Chromeの拡張機能で[オプション]画面の内容の保存や読み込みをしたい人の参考になれば幸いです。
スポンサーリンク
最後までご覧いただきありがとうございます。