Visual Studio Codeの[拡張機能]を自作してみようとチュートリアルを参考に行った手順を備忘録的に投稿します。
下準備
VSCodeでは、拡張機能を開発する際に[Node.js]をインストールする必要があります。
コマンドプロンプトやターミナルの画面で次のコマンドを入力してインストールされているか確認できます。
node -vエラー画面が表示されたら[Node.js]ホームページからダウンロードしてインストールを行います。
[Node.js]インストール後に、次のコマンドを入力して[拡張機能]向けのプロジェクトが作成するための[Yeoman Generator]を追加します。
npm install -g yo generator-codeここまでの作業で[拡張機能]の開発を進めるための準備ができました。
プロジェクトの作成
VSCodeの機能拡張は[TypeScript]や[JavaScript]などで作成する前提になっています。最初にテンプレートになるプロジェクトを作成します。
具体的には次の手順で行います。
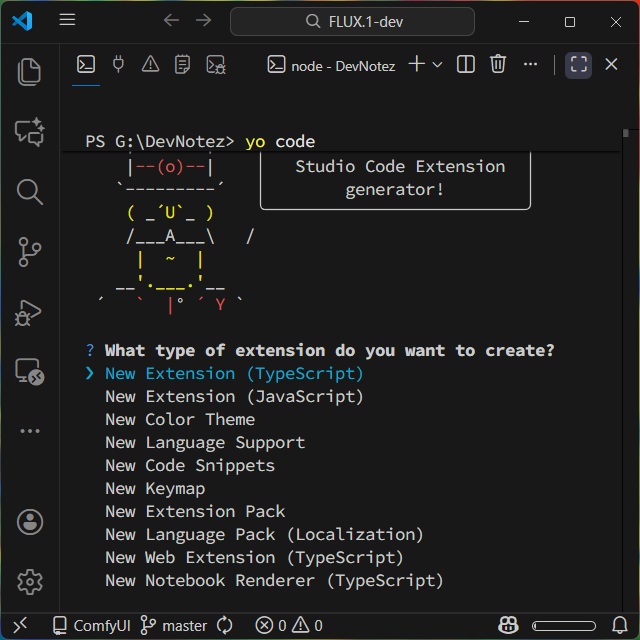
1. ターミナルやコマンドプロンプトで次のコマンドを入力します。(作成されるプロジェクトのファイルが、ターミナルやコマンドプロンプトのカレントディレクトリに作成されるので注意してください)
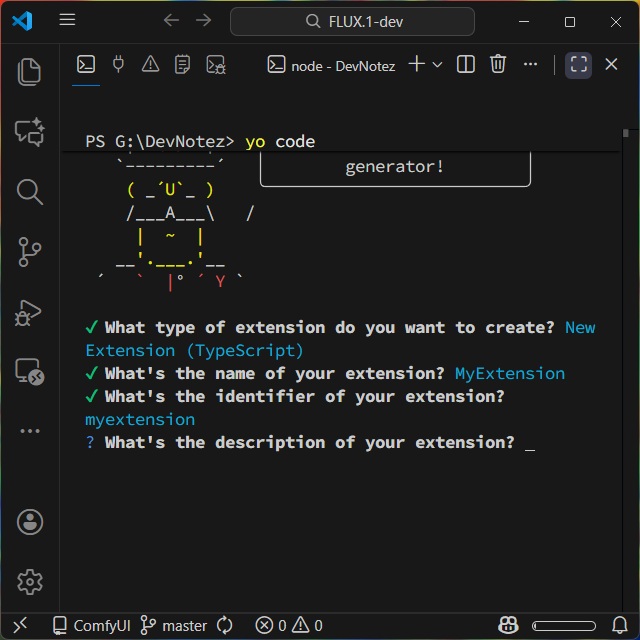
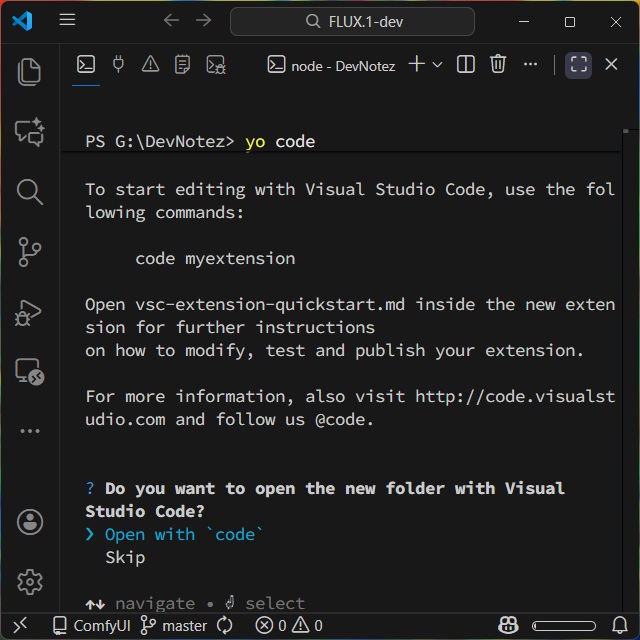
yo code2.[Studio Code Extension generator!]画面の[What type of extension do you want to create?]で[New Extension(TypeScript)]を選択([上下]キーで移動して[Enter]キーで確定)します。
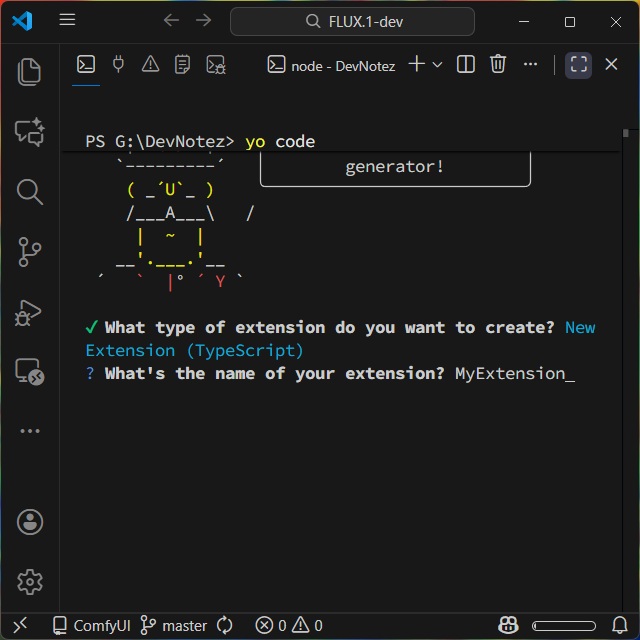
3.[What’s the name of your extension?]で作成する機能拡張の名前を入力して[Enter]キーで確定します。
後でも変更できますが、拡張機能を使う場合のキーワード(例えば[コマンド パレット]で入力するキーワードなど)になります。
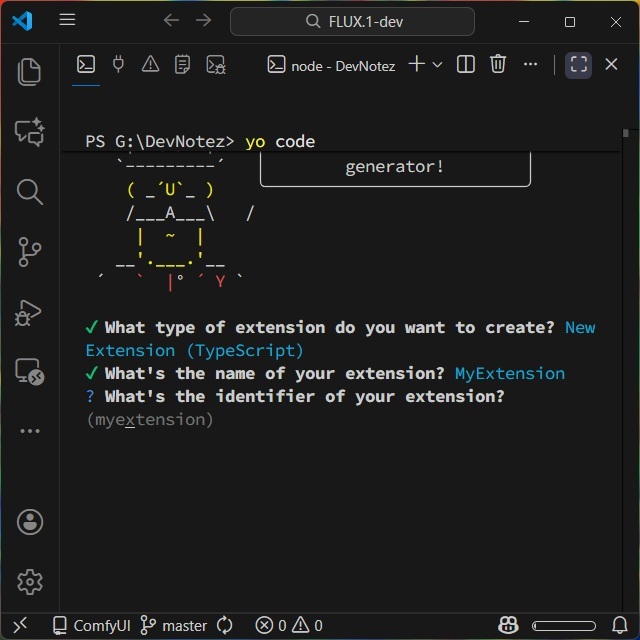
4.[What’s the identifier of your extension?]で作成する一意のIDを入力します。今回は公開しないので既定値のまま[Enter]キーで確定します。
5.[What’s the description of your extension?]で作成する機能拡張の説明を入力します。今回は公開しないので入力せずに[Enter]キーで確定します。
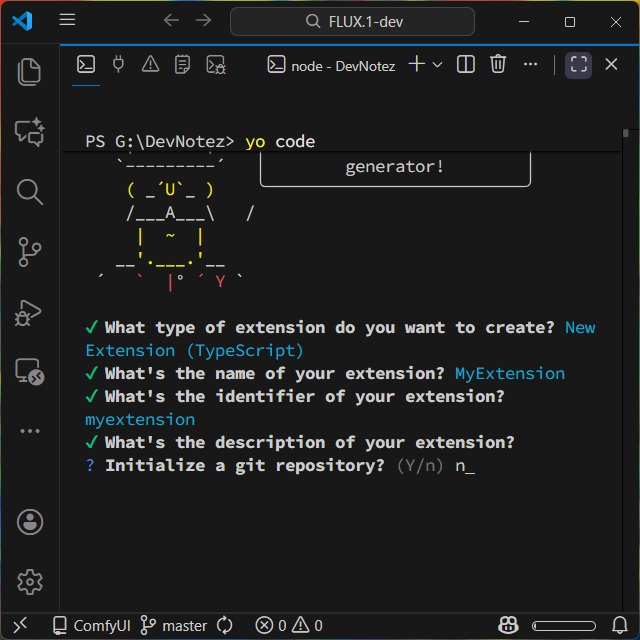
6.[Initialize a git repository?]ではGitHubを利用しないので[n]キーを入力して[Enter]キーで確定します。
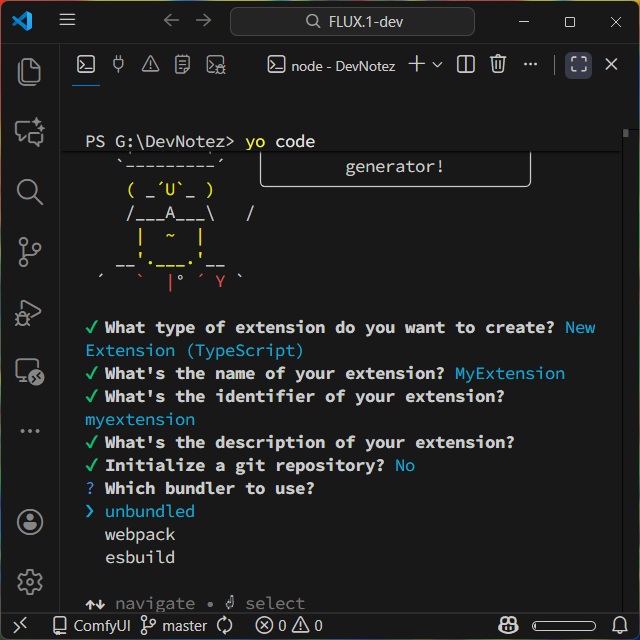
7.[Which bundler to use?]では特に必要ないので[unbundled]を選択して[Enter]キーで確定します。
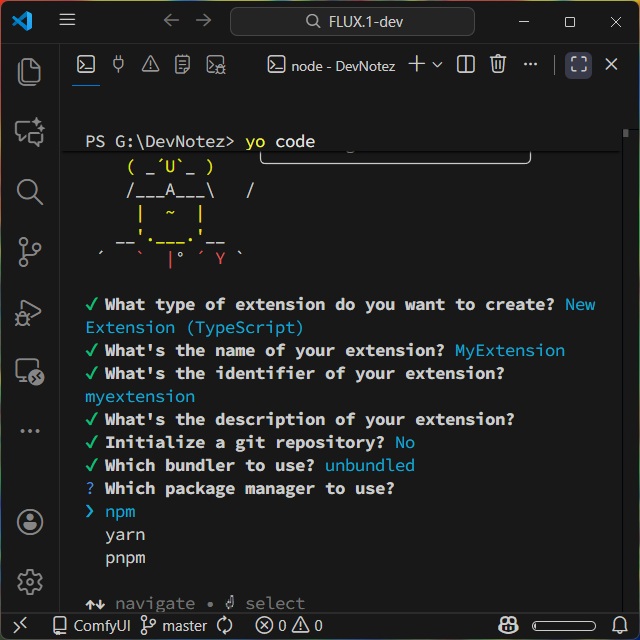
8.[Which package manager to use?]では[npm]を選択して[Enter]キーで確定します。
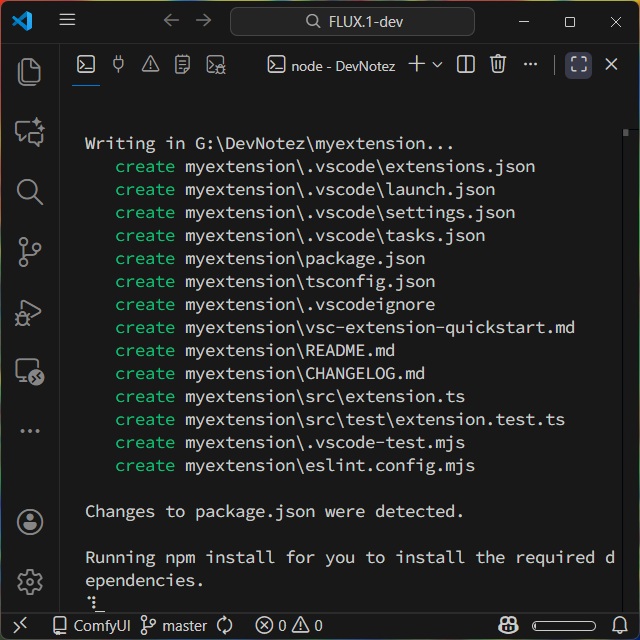
9. プロジェクト用のフォルダーが作成され必要なファイルが保存されます。
10.[Do you want to open the new folder with Visual Studio Code?]で作成されたプロジェクトを開く場合は[Open with ‘code’]を選択して[Enter]キーで確定します。
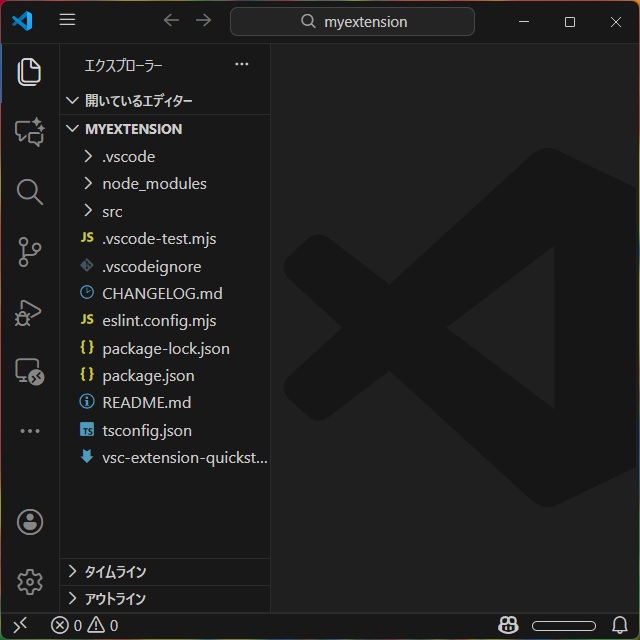
ここまでの作業で、拡張機能に開発に必要なプロジェクトが作成できました。
プロジェクトの実行
作成した機能拡張のプロジェクトは、そのまま実行が可能です。
具体的には次の手順で行います。
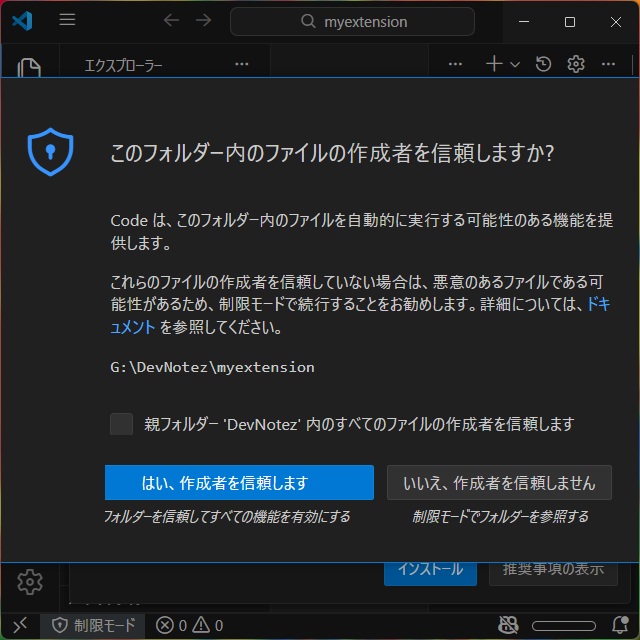
1. プロジェクトのフォルダーを開きます。([このフォルダー内のファイルの作成者を信頼しますか?]画面が表示された場合は[はい]を選択)
2.[プロジェクト]が開いたら[実行|デバッグ開始]メニューを選択します。
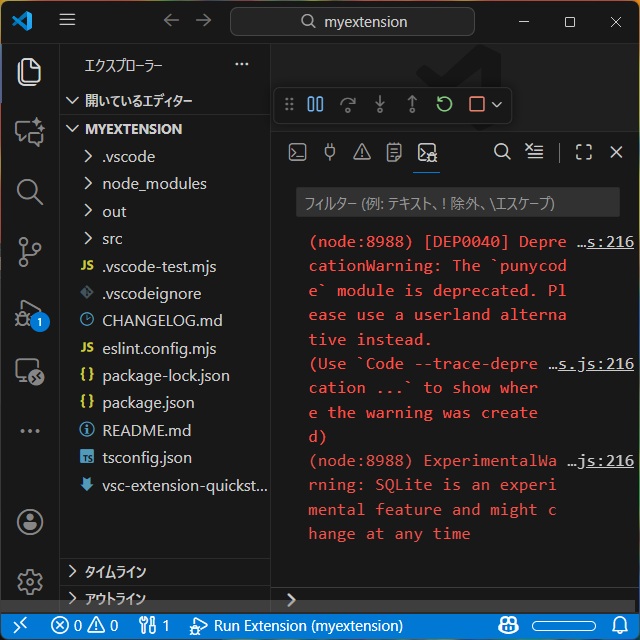
3. プロジェクト内のコードが実行され、別画面で[VSCode]が表示されます。
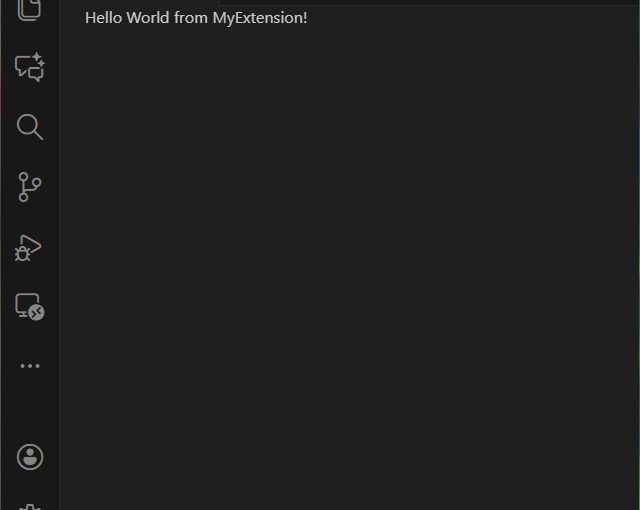
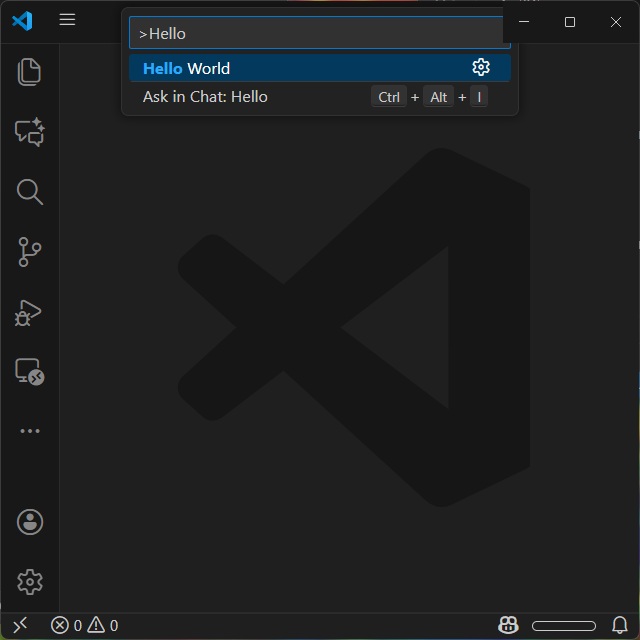
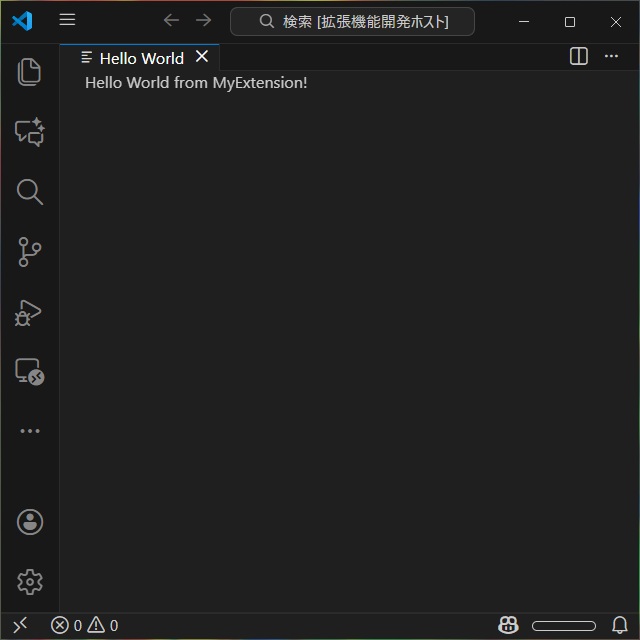
4. コマンドパレットを開いて “Hello World” を検索して選択します。
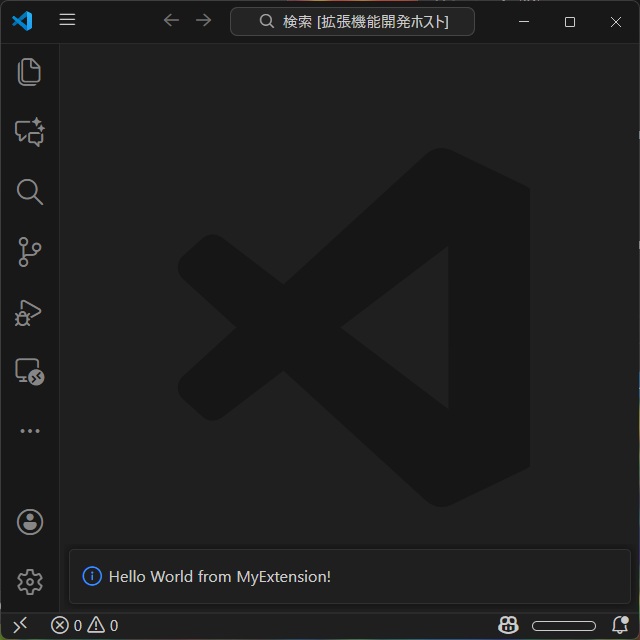
5. [Hello World from MyExtension!]が表示されます。
ここまでの操作で、コマンドパレットからの操作で拡張機能の処理が確認できました。
プロジェクトの編集
[コマンドパレット]からの操作で、編集画面を開くようにプロジェクトを修正してみます。
具体的には次の手順で行います。
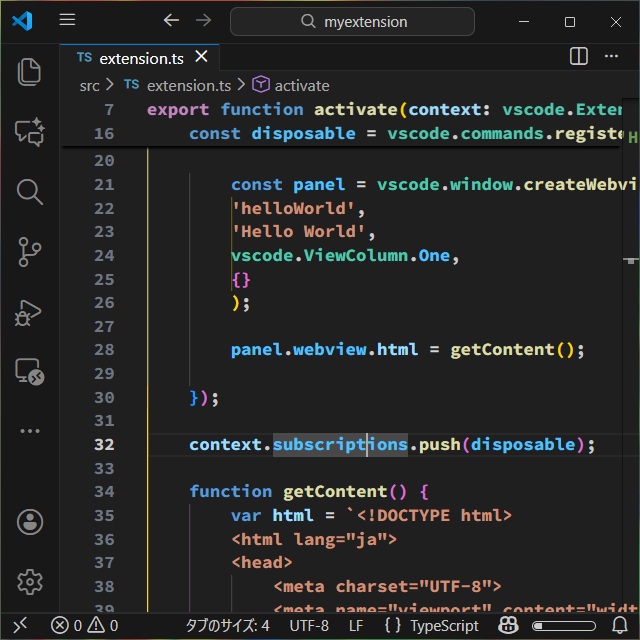
1. フォルダー内の[src\extension.ts]ファイルを開きます。
2. 表示されたコードを修正します。(太字の部分が修整した点)
export function activate(context: vscode.ExtensionContext) {

	// Use the console to output diagnostic information (console.log) and errors (console.error)
	// This line of code will only be executed once when your extension is activated
	console.log('Congratulations, your extension "myextension" is now active!');

	// The command has been defined in the package.json file
	// Now provide the implementation of the command with registerCommand
	// The commandId parameter must match the command field in package.json
	const disposable = vscode.commands.registerCommand('myextension.helloWorld', () => {
		// The code you place here will be executed every time your command is executed
		// Display a message box to the user
//		vscode.window.showInformationMessage('Hello World from MyExtension!');

		const panel = vscode.window.createWebviewPanel(
		'helloWorld',
		'Hello World',
		vscode.ViewColumn.One,
		{}
		);

		panel.webview.html = getContent();

	});

	context.subscriptions.push(disposable);

	function getContent() {
		var html = `<!DOCTYPE html>
            <html>
            <head>
                <meta charset="UTF-8">
                <title>Hello WorlHello World from MyExtension!
            <body>Hello World from MyExtension!
            </body>
            </html>`

		return html
	}
}

// This method is called when your extension is deactivated
export function deactivate() {}
2.[実行|デバッグ開始]メニューを選択します。
3. 別画面で表示された[VSCode]のコマンドパレットを開いて “Hello World” を検索して選択します。
3.[Hello World]タブに[Hello World from MyExtension!]が表示されます。
まとめ
Visual Studio Codeの[拡張機能]を自作するためのプロジェクトの作成について書きました。
[Node.js]などインストールされていない場合には下準備が必要ですが、TypeScriptやJavaScriptなどを利用して、VSCodeを便利にする独自の拡張機能の開発が可能です。
VSCodeで独自の拡張機能を作成したい人の参考になれば幸いです。
スポンサーリンク
最後までご覧いただき、ありがとうございます。