Visual Studio Codeの自作した[拡張機能]に設定項目を追加して値を取得する手順を備忘録的に投稿します。
拡張機能の自作
VSCodeでは、拡張機能を独自に開発して追加ができます。
[Node.js]をインストールする必要がありますが、必要な機能の実装が可能です。
自作の[拡張機能]の開発を進めるための準備やプロジェクトの作成や実行などの詳細は別記事をご覧ください。
設定項目を追加する場所
VSCodeの機能拡張で利用する設定項目を追加する場所は、プロジェクトフォルダー内の[package.json]にあります。
こんな感じで、JSONの[contributes]項目に[configuration]を追加して行います。
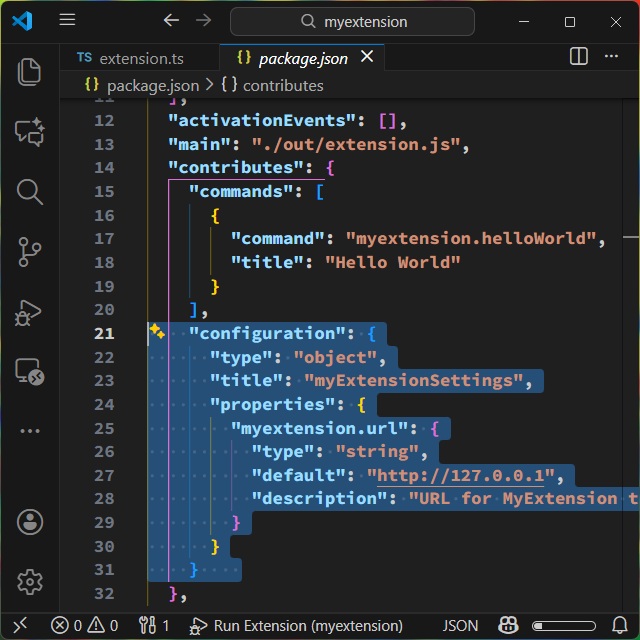
実際には、こんな感じで設定値の[項目 “properties”]や[型 “type”]、[既定値 “default”]などを追加します。
"contributes": {
"commands": [
{
"command": "myextension.helloWorld",
"title": "Hello World"
}
],
"configuration": {
"type": "object",
"title": "myExtensionSettings",
"properties": {
"myextension.url": {
"type": "string",
"default": "http://127.0.0.1",
"description": "URL for MyExtension to connect to"
}
}
}
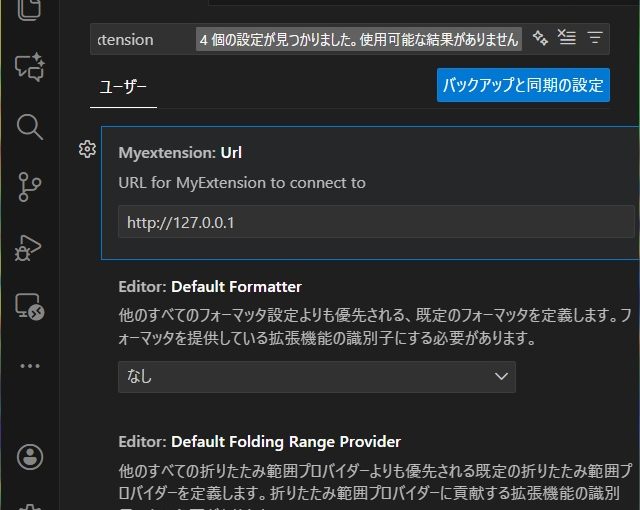
}, この状態で、実行するとデバッグに表示されたVSCodeの設定画面に、設定項目として追加されます。
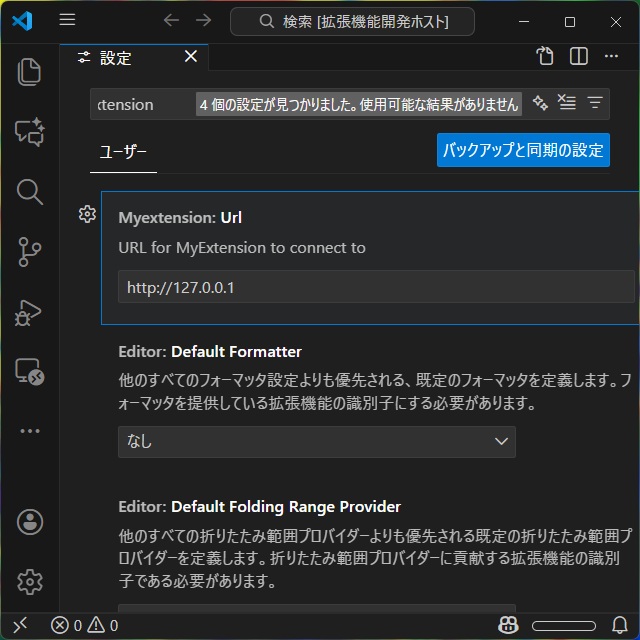
設定項目の取得
追加した設定は、[vscode.workspace.getConfiguration]で取得が可能です。
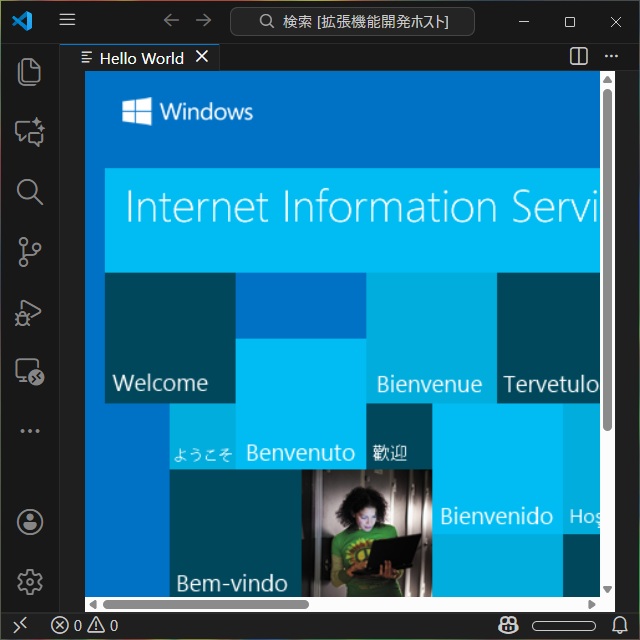
具体的には追加した[url]設定は、次のコードで取得できます。
const url = vscode.workspace.getConfiguration('myextension').get<string>('url');先回、作成した関数に取得した値を利用すれば、ユーザーが表示するURLの編集が可能です。
panel.webview.html = getContent(url as string);

function getContent(url: string) {
  var html = `<!DOCTYPE html>
    <html>
      <head>
        <meta charset="UTF-8">
        <title>Hello World</title>
        <style>
        html
        {
          display:flex;
          width:100%;
          height:100%;
          min-height:100%;
        }
        body
        {
          display:flex;
          flex:1;
        }
        iframe
        {
          flex:1;
          border:none;
        }
        </style>
      </head>
      <body>
        <iframe src="http://127.0.0.1"></iframe>
      </body>
    </html>`
    return html
}
まとめ
Visual Studio Codeの自作した[拡張機能]に設定項目を追加して値を取得する手順について書きました。
プロジェクトフォルダーの[package.json]のJSON内に[contributes]項目に[configuration]に項目の内容を追加して拡張機能で利用できる設定が追加できます。
VSCodeで独自の拡張機能で変更可能な設定値を利用したい人の参考になれば幸いです。
スポンサーリンク
最後までご覧いただき、ありがとうございます。